Well almost!
This is the Rolica scenario from Albion Triumphant but with different units. The British attacked the outnumbered French defending high ground. The going was very hard restricting movement to half. As a result all cavalry had to throw to test for disorder at the start of each move, a 5 or 6 resulting in disorder. This rule played a significant part in restricting cavalry operations for both sides just as in the real battle.
This is the Rolica scenario from Albion Triumphant but with different units. The British attacked the outnumbered French defending high ground. The going was very hard restricting movement to half. As a result all cavalry had to throw to test for disorder at the start of each move, a 5 or 6 resulting in disorder. This rule played a significant part in restricting cavalry operations for both sides just as in the real battle.
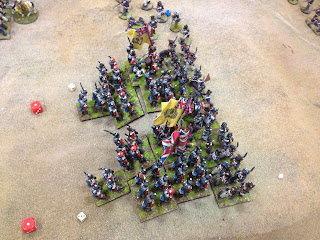
The British initial dispositions under the command of Carl.
The French under the command of Tom defending their hill.
The British start their advance but the small central brigade fall behind straight away.
The French wait patiently on their hill.
Once again the British centre fails to move as their colleagues press on.
French cavalry form into column with the intention of marching to the right flank.
The 14th Light Dragoons advance as their KGL comrades are disordered crossing the terrain.
As the French cavalry became disordered there was no movement on the ridge so the British moved again with the cavalry continuing their flank march and the centre brigade finally on the move.
French Dragoons finally continue their move across to the right. French artillery open fire causing a casualty on the British skirmish line..
The British advance stalls but their skirmishers open fire causing a casualty
Also on the right flank.
The French attempt to deploy their infantry into line but blunder into the adjacent battalion.
British artillery fires on the French line causing one casualty.
Accurate French skirmisher fire causes casualties amongst the British and Portuguese light units.
We used the bounce through rule from AT2 in this game.
French 8ibr.
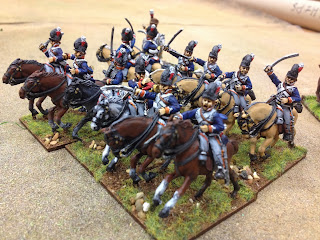
British cavalry Brigade with 1st Hussars KGL (Perry plastics) and the newly painted 14th Light Dragoons (Brigade games)
British artillery target the French line on the ridge.
Brunswick Oels fire effectively at the French skirmishers.
The other British battery joins in the fun.
With the British cavalry remaining stalled on the left flank the French skirmish line are left free to fire at their British counterparts.
French infantry deployed in line on the left flank.
Bounce through is more effective this time causing casualties and disorder amongst the British column.
British columns advance towards the French who have all deployed into line while their skirmishers attempt to drive off the French skirmish screen.
Skirmish screens continue to exchange fire.
French skirmishers pushed back behind their line.
14th Light Dragoons.
French blunder causing the unit to fall back.
Column and line face off.
First melee of the game.
The British advance in the centre.
A unit of French skirmisher s is the first to be lost.
Closing fire from the French line leaves the British disordered.
The French lose this one by 2.
but carry on fighting.
French cavalry crossing the ridge.
British cavalry finally line up ready to menace the French flank.
Having recovered from disorder the British engage in a firefight with the French.
The melee on the British right flank continues.
This time the French run away in fine style.
The British follow through into the next French line. Closing fire on both units results in casualties.
Further along the line the British also charge.
While their skirmishers attack the artillery.
The British lose the follow through melee and one unit is thrown back.
At close of play the British had gained a foothold on the ridge but as usual on club nights we were 1 move short of achieving a likely result to the game!
Rules were Black Powder and AT1.
Thanks for looking.
Thanks For Reading
Mick


0 Yorumlar